Introduction #
This document is a shortened version of the Safestar system user manual. It has been prepared to provide the most important and essential information that will help you get started with our application. If you need more detailed information, please contact our technical support team.
Safestar Application Modules #
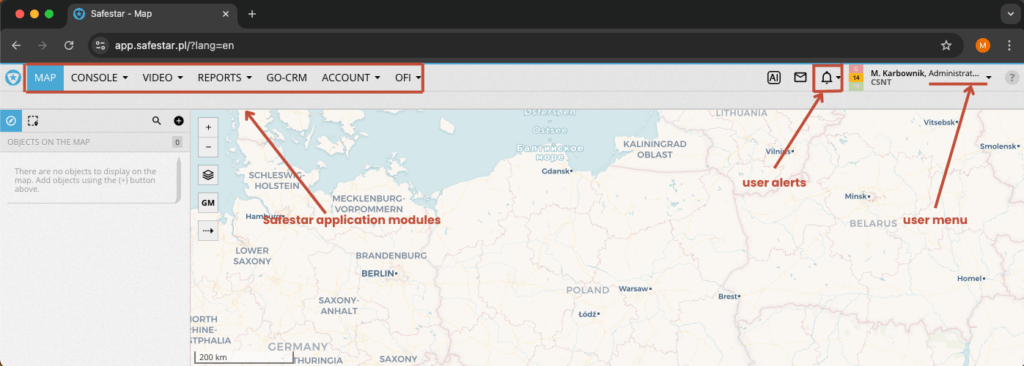
The Safestar system is divided into modules, which are visible to the user after logging in, in the form of a top menu. The menu items are as follows:
- Map – a module dedicated to handling GPS devices/recorders. It allows visualization of the current position of devices on a digital map, along with the full set of information transmitted by the transmitters. It also enables monitoring of currently supervised stationary objects.
- Console – the main module of the Safestar system intended for monitoring station employees (operators). All alarms and events generated by alarm systems are displayed here.
- Video – a module for managing camera views, enabling real-time live preview.
- Reports – configuration and generation of system reports.
- GO CRM – a module currently phased out.
- Account – a module for managing devices, object groups, objects, system users, and their permissions.
- OFI – a physical security module (security personnel, contract execution logs, object logs).
- Safestar AI – an artificial intelligence module (used query limit, recent AI checks).
- Messages – a messaging module.
- Alerts – creation and configuration of system alerts, SMS and e-mail templates.
- User menu – a handy user menu that allows management of your own account, access to the Safestar system manual, and device configuration data.
Device Profiles (signal dictionaries) #
The Safestar system is equipped with a set of standard dictionaries for all the most popular transmitters available on the market. Device profiles are essential for the proper reception and processing of signals transmitted by devices. We do not recommend using the system profiles directly. Instead, we suggest creating your own “clients” copies for the types of devices that will be connected to your account. To do this, go to the Account menu, select Device Profiles, and from the displayed list find the appropriate template, then copy it using the button at the end of the row.

The copied profile can be freely modified and adjusted to your needs. Each row in the dictionary contains a code transmitted by the device. For each code, you can individually define a description, type of signal and event, priority.
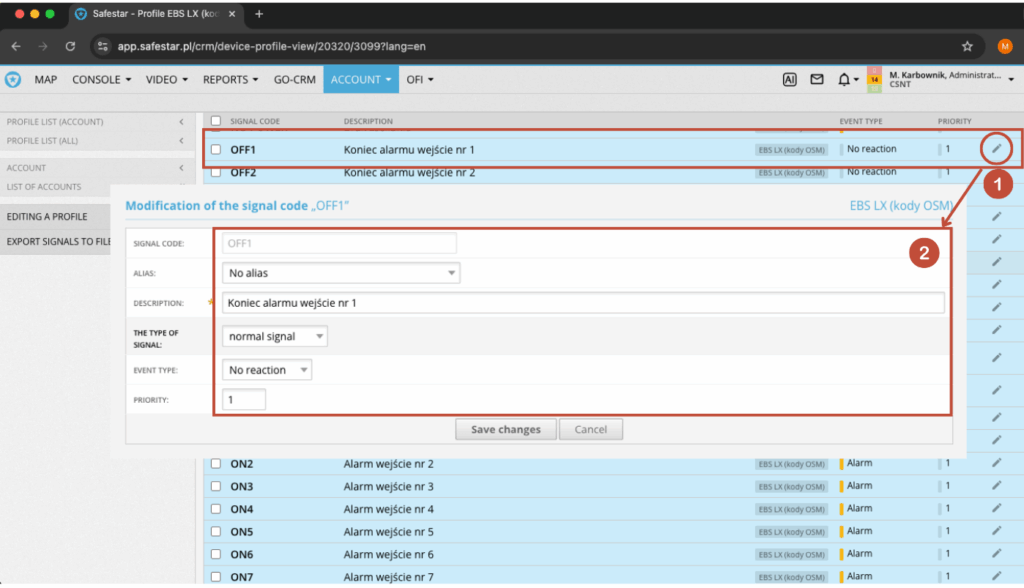
In the form that appears after selecting the option to edit a given code, you can configure:
- the event description that will be displayed on the operator’s console
- the signal type (regular signal, test signal, etc.)
- the event type: Critical Alarm, Alarm, Warning, Notification, No Reaction, Information
- the priority, which further distinguishes the importance of events within the same type; it can range from 1 (most important) to 255 (least important)
Adding transmitters #
In order for the Safestar system to correctly receive signals from a transmitter installed at the monitored site, the device must be added. To do this, go to the Account → Devices → Devices menu. In the menu that appears on the left side of the view, select the Add device option.
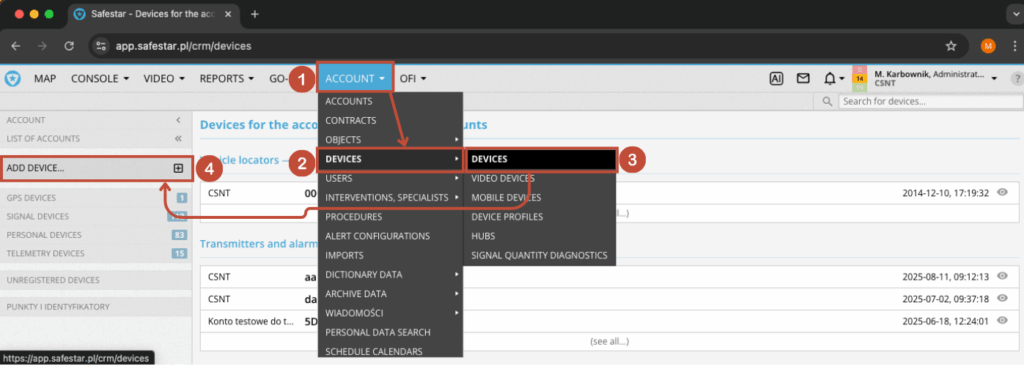
After selecting the above option, the user will be redirected to the form for adding a new device.
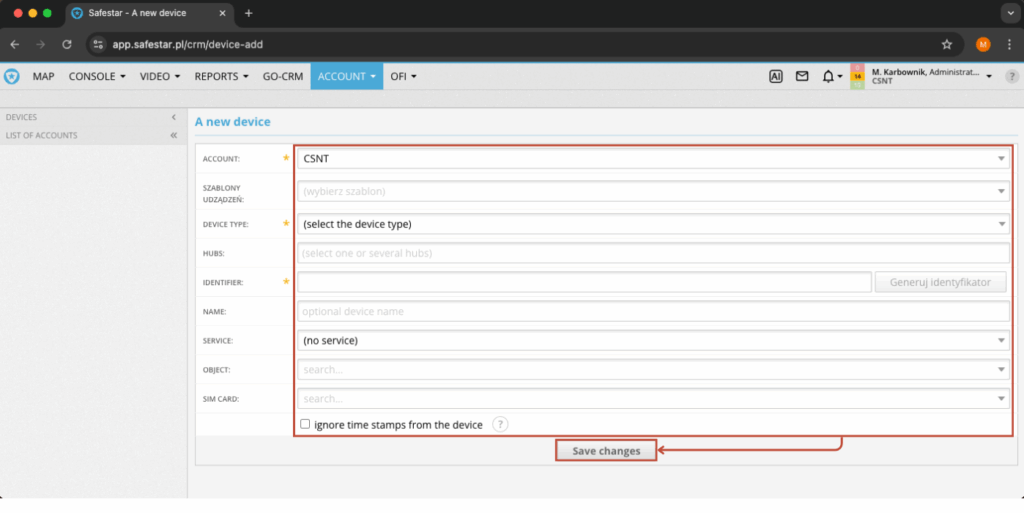
At this stage, you need to fill in the following fields:
- Account – by default, the account of the currently logged-in user is selected.
- Device template – here you can choose a device template, if one has been created beforehand. It will automatically fill in the fields: device type, concentrators, and assign the appropriate signal profile.
- Device type – select the appropriate device type from the drop-down list, e.g., EBS CP, etc.
- Identifier – depending on the device type, the identifier may take different forms, such as a serial number, IMEI number, etc.
- Concentrators – some types of transmitters require selecting an appropriate concentrator.
- Object – here you can also immediately link the transmitter/device to a monitored object, provided that it has already been added to the system.
- SIM card – here you can link a SIM card to the device, provided that it has already been added to the system.
Attention! Detailed information about identifier types and concentrators, as well as the data required to correctly configure the transmitter, can be found in a separate manual available at:UWAGA! Szczegółowe informacje o rodzajach identyfikatorów i koncentratorach, oraz dane potrzebne do poprawnego skonfigurowania nadajnika znajdują się w osobnej instrukcji dostępnej pod adresem: https://app.safestar.pl/crm/manual-pdf/33.
After saving the form, you will be redirected to the transmitter edit tab, where you have to complete the configuration by assigning a signal profile (go to profile management).
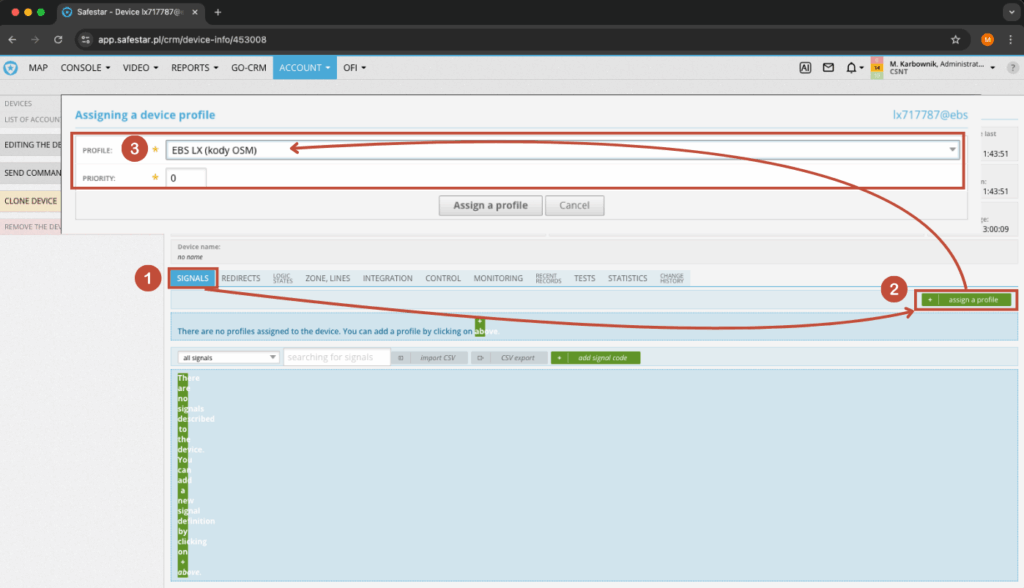
To assign the appropriate profile, go to the Signals tab and select the Assign profile option (on the right side). Then, in the form, choose the correct signal profile for the transmitter and confirm by clicking Assign profile. From that moment, all signals received by Safestar will be processed according to the template and will generate the appropriate events on the system console.
Important information! Detailed instructions for adding different types of transmitters can be found in the category adding and configuring devices.
Configuring transmitter test supervision #
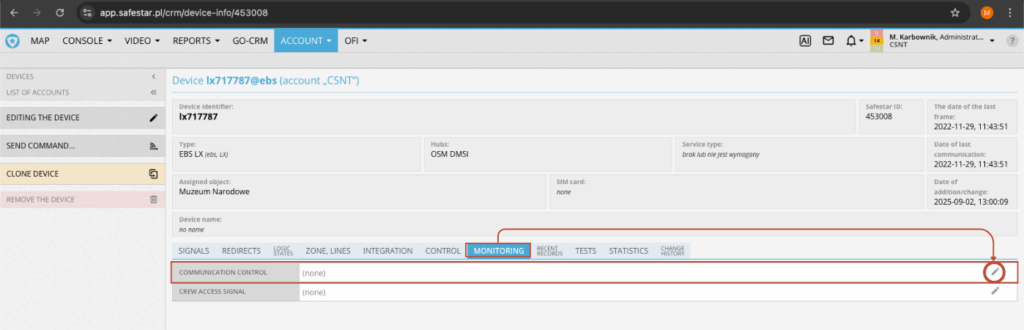
To set up transmitter test supervision, go to the device edit tab by selecting Account → Devices → Devices and click on the chosen transmitter. In the edit tab, under the Monitoring section, click the edit icon for the communication supervision option.
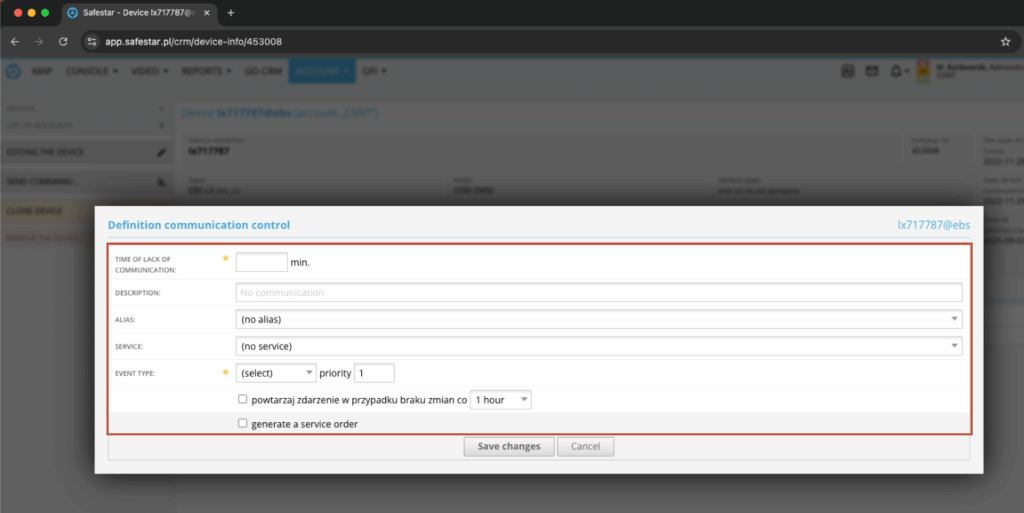
In the tab that opens, fill out the form by providing:
- the allowable maximum time without any signal from the transmitter
- the event description for the console operator
- the event type
- the priority
- indicate whether the event on the console should be generated once or cyclically after each elapsed defined period
Attention! The system treats every received signal (not just test signals) as valid communication, and the configured allowable time is counted from the last valid signal of any kind.
Object groups #
Object groups are a very important element of the Safestar system, as they are used for assigning user permissions to selected objects, generating summaries and reports, performing various group operations in the system, etc.
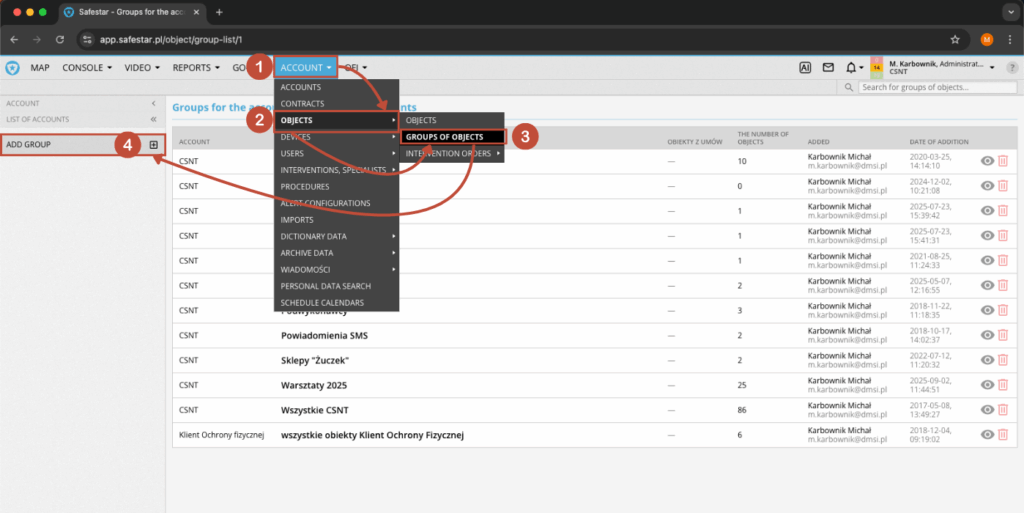
When an account is created, the first group named “All” is automatically created. Group management is done in Account → Objects → Object groups. A new group can be added by selecting “Add group” from the menu on the left side.
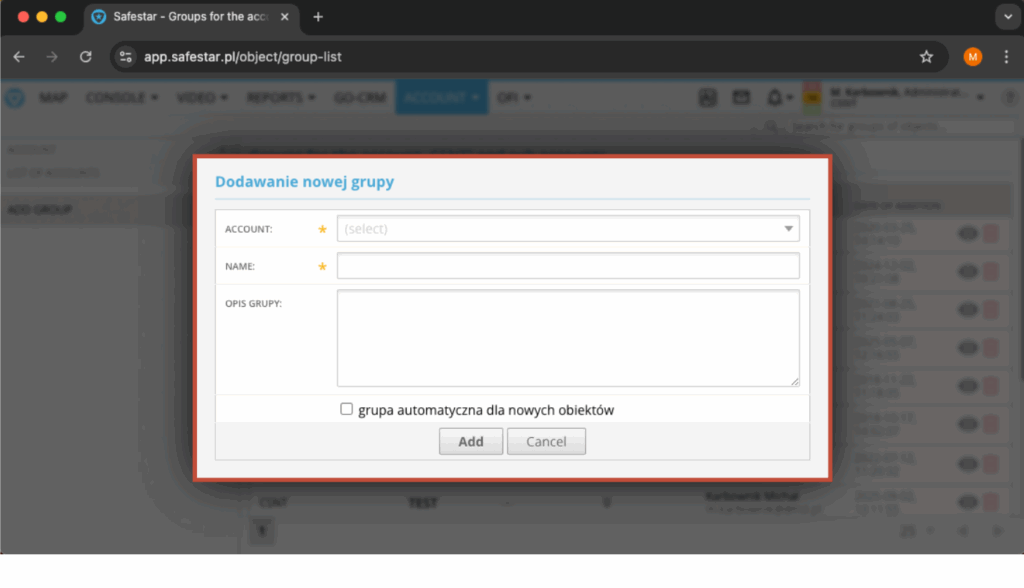
The form requires providing:
- the account for which the group will be added
- the group name
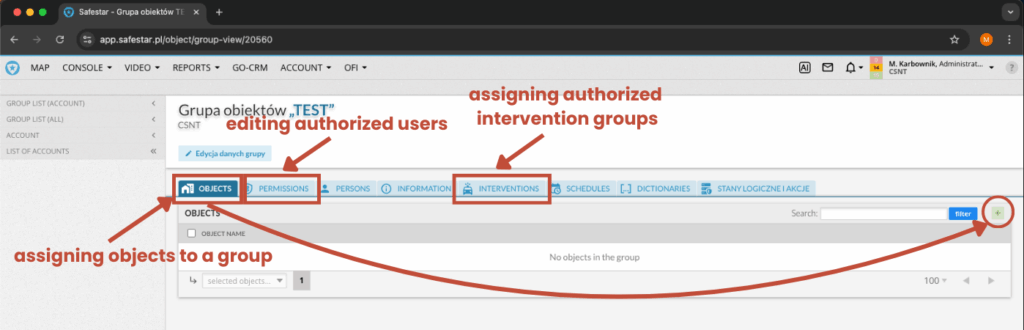
After creating a new group you need to proceed to its configuration.
Attention! A single object can be added to a specific number of groups, which allows grouping objects based on selected attributes to facilitate later management.
Adding an object #
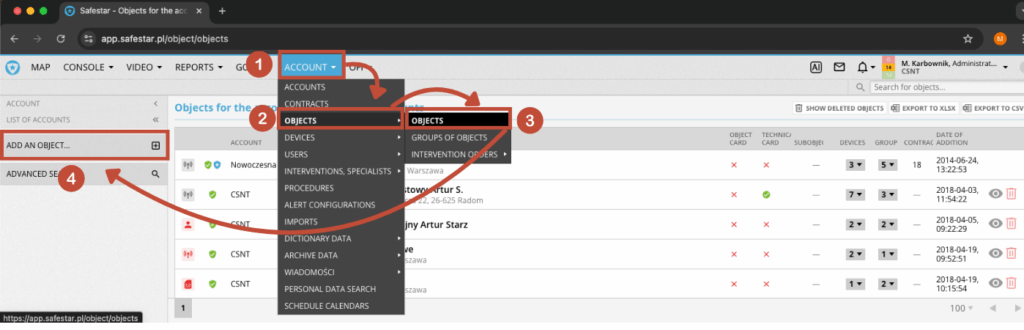
To monitor events in the Safestar system, the object must be registered in the system. To do this, select Account → Objects → Objects, then from the menu on the left side, choose the Add an object option.
Basic information #
Next, a new tab will appear where you should fill in the basic object data.
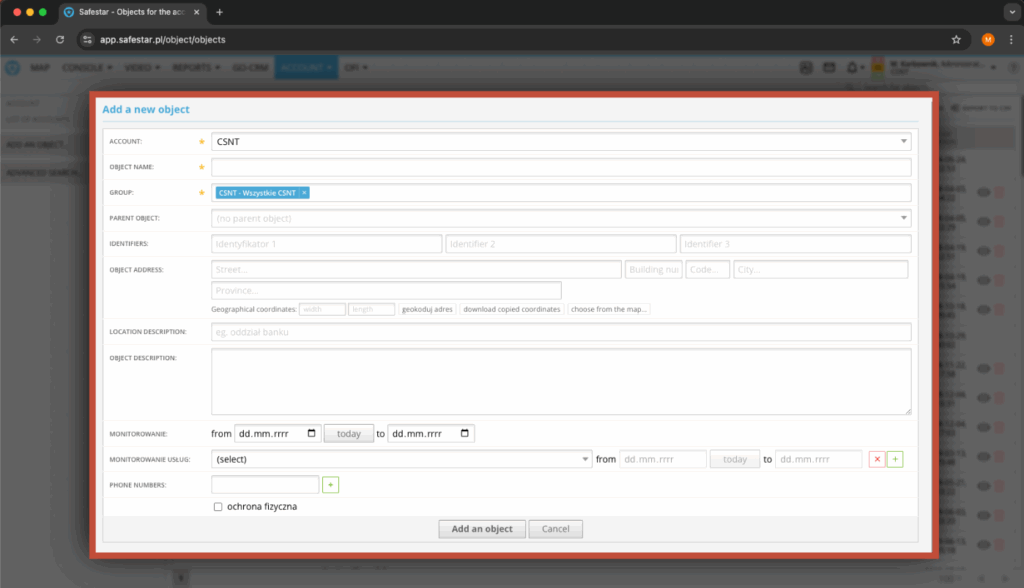
The form requires providing:
- Account – by default, the account of the currently logged-in user is selected
- Object name – any name for the monitored object
- Groups – here you can assign selected object groups (it is good practice to assign new objects to the All objects group)
Important information! Additionally, it is recommended to fill in the monitoring start date and the object’s address, providing basic information such as street and city. Based on these system data describing GPS coordinates, it is possible to enable object location on the system maps.
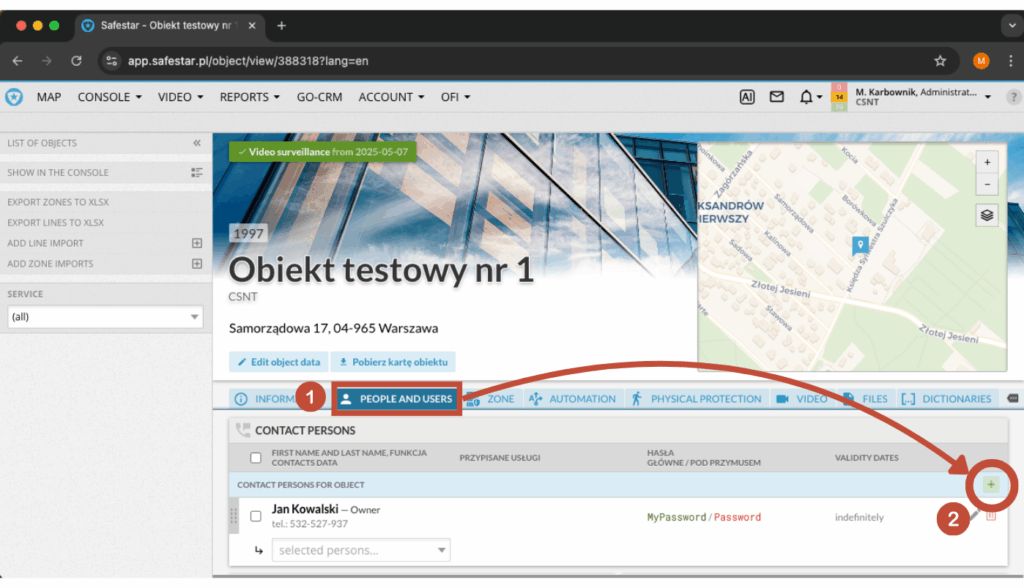
Contact persons #
To fill in information about contact persons at the object, go to its edit view, then select the People and Users tab. To add a new person, click the “ +” button on the right side of the list.
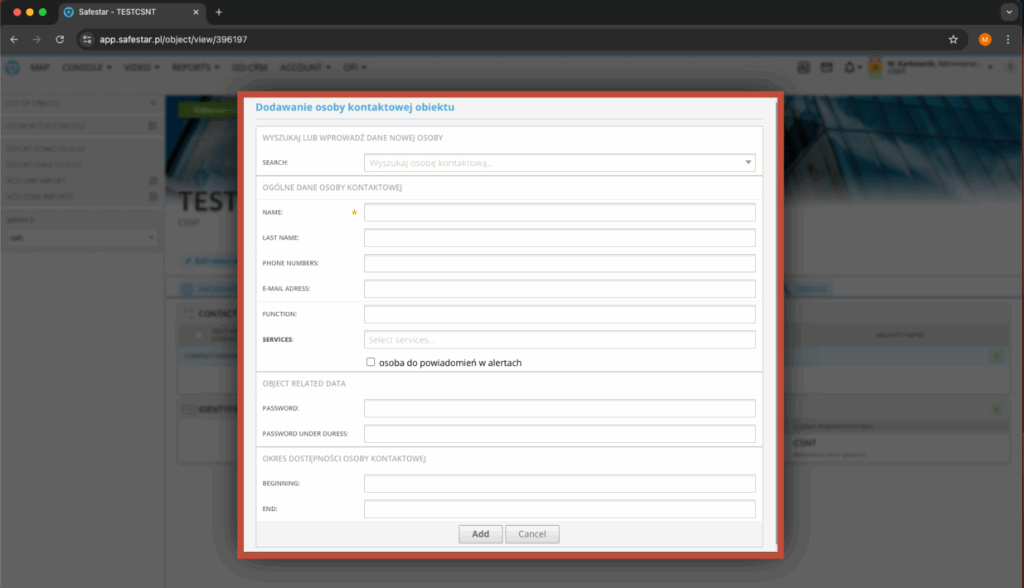
The add/edit contact person form requires entering the person’s first name, which is a mandatory field.
Other data are optional but recommended:
- Phone numbers – any number of contact numbers
- Role/position – information for the operator regarding the person’s role, e.g., object owner, site employee
- Password – password for verifying the contact person at the site
- Duress password – password to be used in case of a life-threatening situation
- Start and end dates – the period during which the contact person is active at the site
Zones and lines #
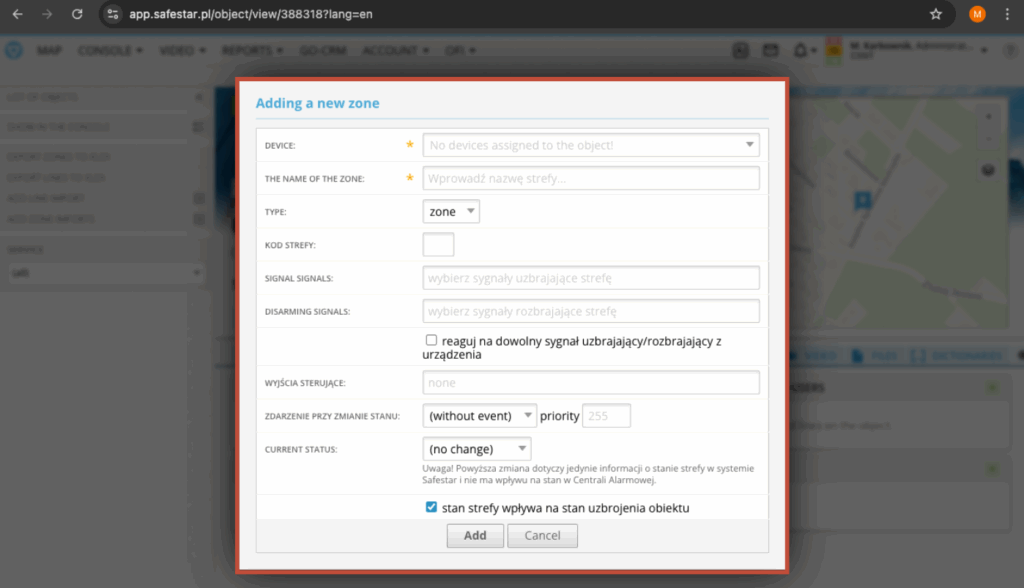
To fill in information about zones and lines at the site, go to its edit view, then select the Zone tab. To add a new zone or line, click the “+” button on the right side of the respective tab.
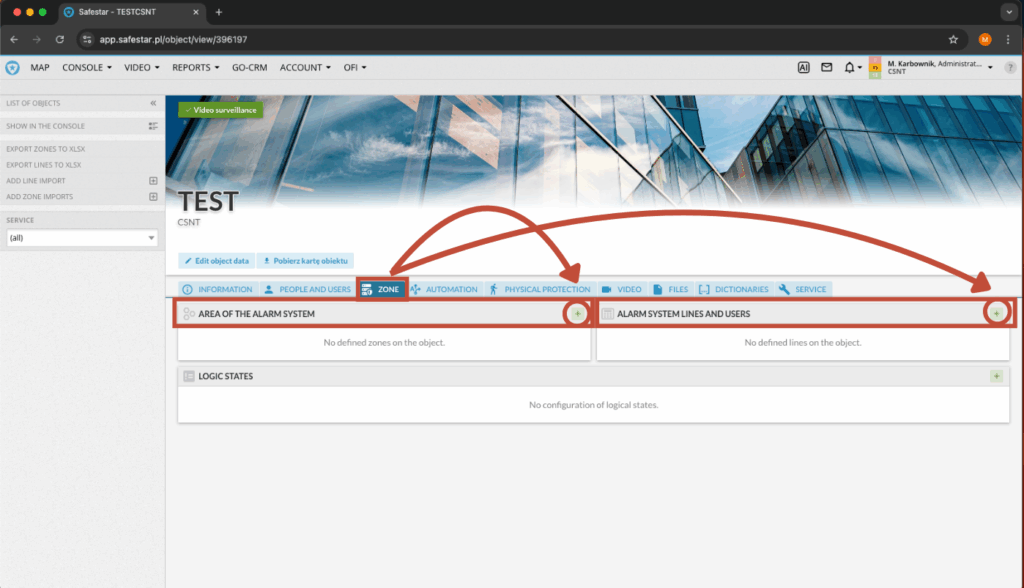
The add/edit zone form requires entering the zone name and selecting the appropriate device; these are mandatory fields.
- Arming signals – specify the signals that will cause the zone to be armed
- Disarming signals – specify the signals that will cause the zone to be disarmed
- Event on state change – option to generate an event on the operator console when the zone state changes
Additionally, you can thick checkbox to make the zone state affect the object’s overall arming status.