This document is a condensed version of the instructions for configuring and adding EBS ActiveGuard and ActiveTrack devices to the Safestar system. If you need more detailed information, please contact our technical support team.
IMPORTANT INFORMATION! If you are using your own EBS OSM server, you have to contact our technical support team before configuring the device.
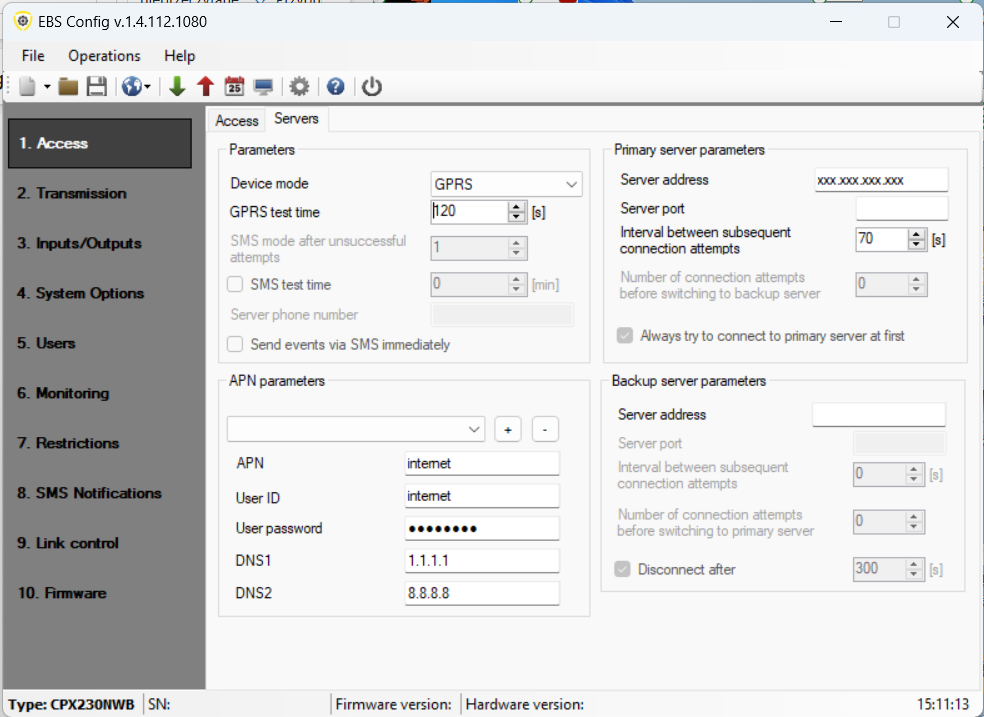
In the EBS Config program, go to the Access → Servers and Units tab:
- Device mode: select “GPRS”
- GPRS test time (this is the time between the device sending test messages to the server): recommended value above 300s
- Primary server parameters:
- Server Address: the address of the server the device will connect to.
- Server Port: TCP port of the server (the port varies depending on the device type).
- Access point parameters:
- APN; ID; Password: dependent on the mobile operator.
- DNS1 and DNS2: required when using domains instead of IP addresses (example DNS servers: 1.1.1.1; 8.8.8.8).
In addition to the standard device programming via the EBS CONFIG program, it is also possible to configure the device using SMS messages. Below is a simple method for doing this.
- Insert a SIM card into the device, then from any phone, send a configuration SMS to the device with the following content:
1111 SERVER=xxx.xxx PORT=xxxx DNS1=8.8.8.8 TPERIOD=5 KILL
- Access code – 1111 – if it’s set.
- SERVER= the address of the server that the device will connect to.
- PORT= TCP port of the server (the port varies depending on the device type).
- DNS – DNS address
- TPERIOD=5 – time interval (in minutes) between consecutive test signals.
- After sending the configuration SMS, the device should start operating according to the new settings.
NOTE! The data required for correctly configuring the transmitter can be found in a separate manual available at: https://app.safestar.pl/crm/manual-pdf/33
Configuration in the Safestar System #
Adding an Object to the System #
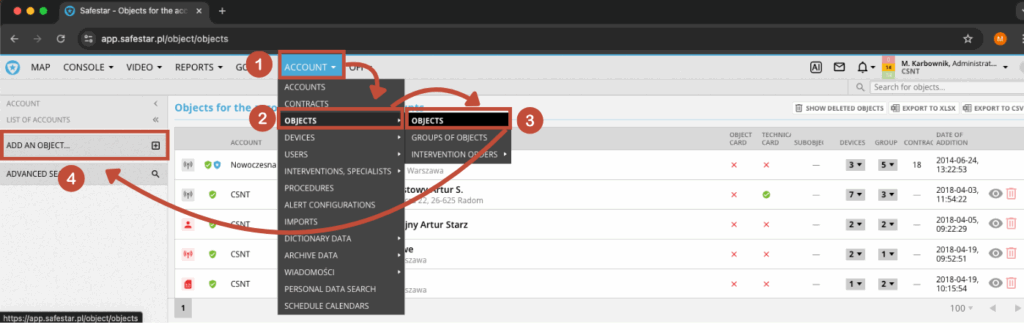
In order to monitor events in the Safestar system, you must first create an object. To do this, select the Account → Objects → Object module, then from the menu on the left, choose Add Object.
A new window should then appear, where you need to fill in the basic information about the object.
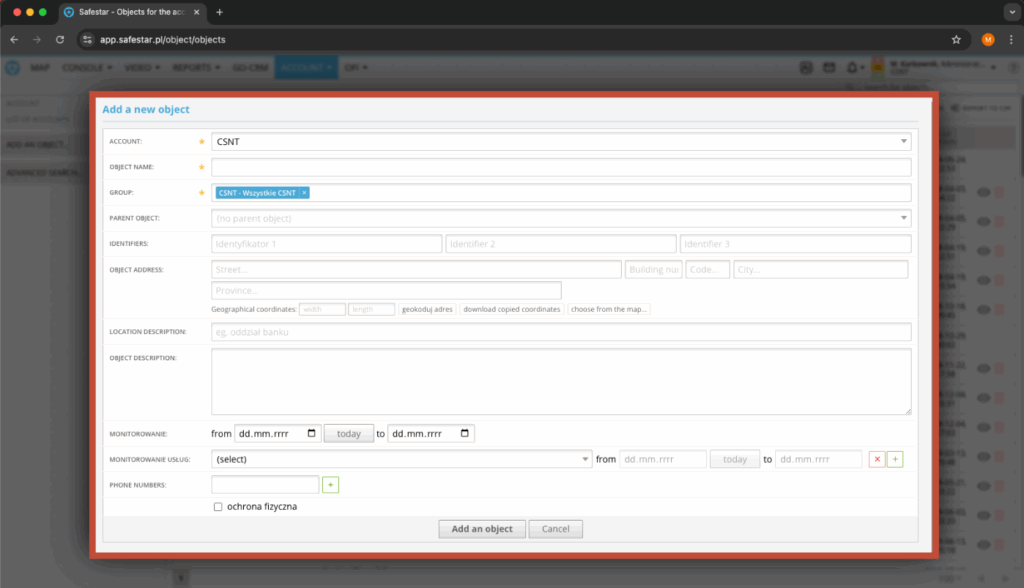
The form requires the following information:
- Account – by default, the currently logged-in user’s account is selected
- Object name – any name for the monitored object
- Groups – here you can assign the object to selected groups (a good practice is to assign new objects to the All Objects group)
IMPORTANT INFORMATION! Additionally, it is recommended to fill in the monitoring start date and the object address by providing basic information such as street and city. Based on this system information, which describes GPS coordinates, it is possible to enable the object’s location on the maps within the system.
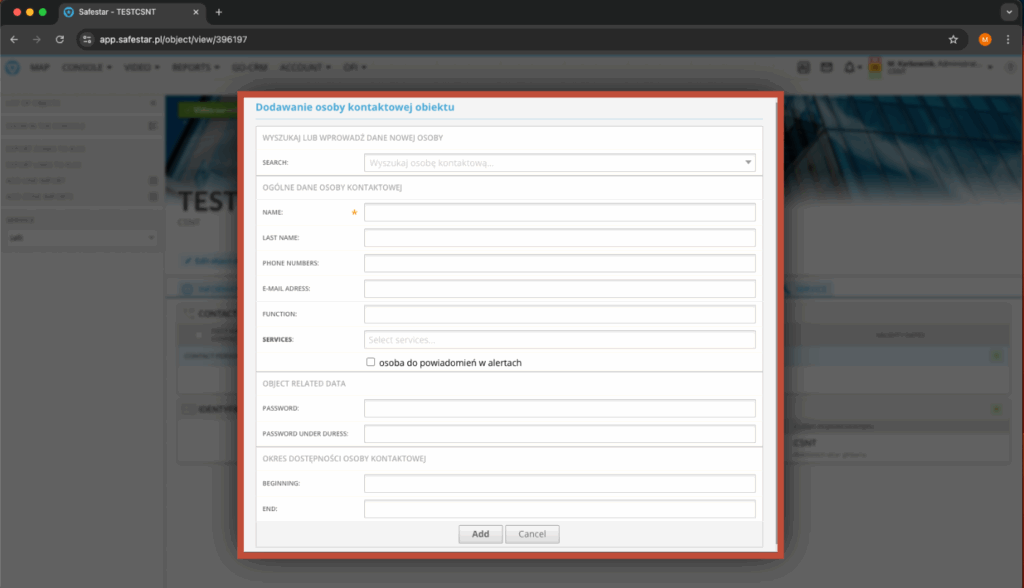
To complete information about contact persons for the object, go to its edit mode, then select the People and Users tab. To add a new person, click the “+” button on the right side of the list.
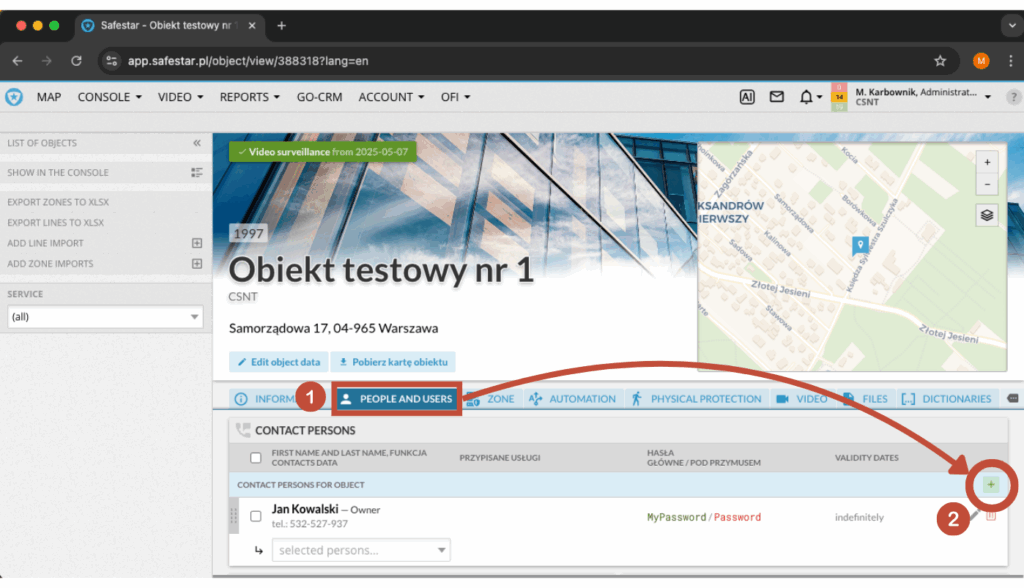
The form for adding/editing a contact person requires entering the person’s first name, which is a mandatory field.
Other information is not mandatory, but it is recommended to provide it:
- Phone numbers – any number of contact numbers can be added
- Function (role/position) – information for the operator regarding the person’s role, e.g., object owner, object employee
- Password – password for verifying the contact person at the object
- Password under duress – password to be used in case of a life-threatening situation
- Beginning and End dates – the period during which the contact person is valid for the object
Adding a Device to the System #
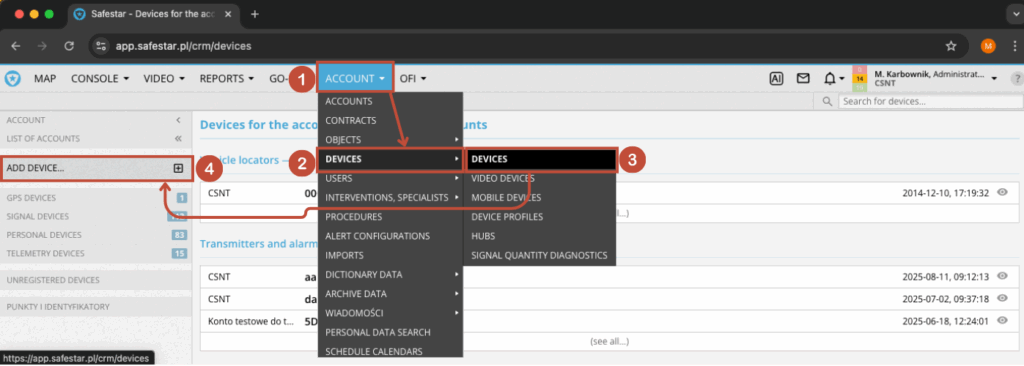
To correctly receive signals from a device installed at a monitored object in the Safestar system, the device must be added. To do this, select the Account → Devices → Devices in the menu. Then, from the menu that appears on the left side of the view, choose Add Device.
After selecting the above option, the user will be taken to the form for adding a new device.
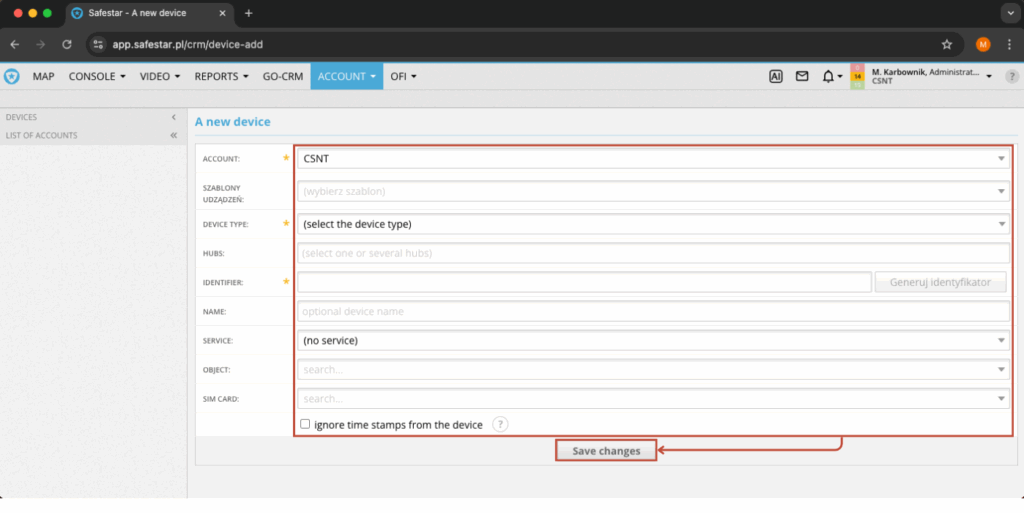
At this point, the following fields need to be filled in:
- Account – by default, the currently logged-in user’s account is selected
- Device template (Szablon urządzeń) – here you can choose a device template, if one was previously created. It will automatically fill in the fields: device type, concentrators, and assign the appropriate signal profile
- Device type – select the appropriate device type from the drop-down list, e.g., EBS ACTIVETRACK or EBS ACTIVEGUARD
- Identifier – the serial number of the AG or AT device. Add the prefix “ag” or “at” to the number, omitting all leading zeros. Example: if the identifier is 093659, enter ag93659 or at93659
- Hubs (Concentrators) – (parameter to be determined with the system administrator); for testing, you can select EBS OSM (XML) — DMSI Tests
- Object – here you can immediately link the device to a monitored object, if one was previously added to the system
- SIM card – here you can link a SIM card to the device, if one was previously added to the system
After saving the form, go to the device edit tab, where the configuration should be completed with the signal profile (go to Profile Management).
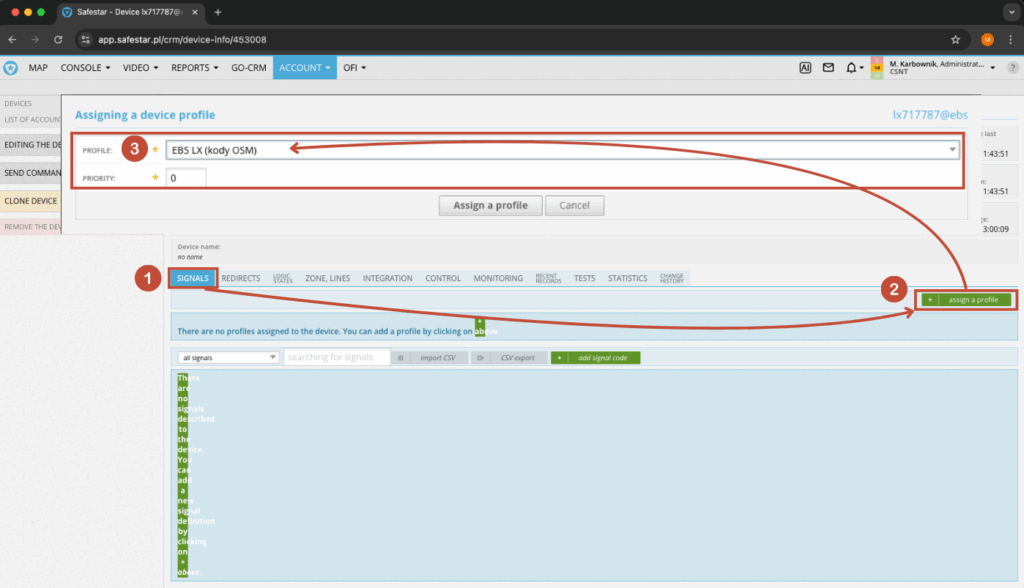
To assign the appropriate profile, go to the Signals tab and select Assign Profile (on the right side). Then, in the form, choose the signal profile suitable for the transmitter and confirm by clicking Assign Profile. From this moment, all signals received by Safestar will be processed according to the template and will generate the corresponding events on the system console.
Configuration of Checkpoints and Patrol Routes #
Information about configuration of checkpoints, patrols, and described routes is described in another document: link.


